VI - Miscellaneous
[
standard op. procedures |
graphic tools |
k space calculator |
help |
about ||
main help index
]
1. Standard operating procedures
While many settings within WinSPA can be accessed independetly via non-modal forms, it is important
to understand how they influence the acquisition of scan data, conversion of units, correction
of instrumental errors etc. . In fact, it is helpful to consider the combination of different
calculation tools and settings as "standard operation procedures", i.e., applying
tools and changing settings always after certain changes of the LEED system, sample, etc.
These standard operation procedures are described in the following. It is strongly recommended to
print out this section and keep it available at the SPA-LEED control PC for everyday use.
For a new SPA-LEED system (or after the first installation of WinSPA)
- Calculate the k space sensitivity for internal and external geometry.
The k space sensitivity is used for the conversion from deflection voltages
to all other k-space units. Its correctness is therefore mandatory
for a correct k-space scaling.
- Use a well known sample type with a well-ordered reconstruction (such as Si(111)(7x7)).
- Open a 2D scan form. Choose Volts as scan units.
- Do a large overview 2D scan over about two Brillouin zones.
- Select a known distance with the line tool, for example
a full BZ or the distance between two superstructure spots.
- Copy the line parameters to clipboard.
- Open the k sensitivity calibration form.
- Paste the line parameters. Enter also the corresponding length in %BZ.
- Click on Calculate, and then on Apply. The sensitivity value is then copied to the software settings form.
- Apply new k sensitvity value in the "software settings > LEED system" tab.
Note: It is helpful - as a zeroth order sensitivity analysis - to repeat the above
described procedure 3-4 times with different selected lines to estimate the accuracy.
Note: In case you use an "external" electron gun in a RHEED-like geomtry
you will notice a very pronounced nonlinearity of the reciprocal space metrics.
Using other units than Volts in the external geometry does therefore usually not make sense.
- Measure the geometries (angles) in the system.
Either derive these values from drawings of the manufacturer or measure them physically in your system:
Distance d1 between gun and sample, distance d2 between gun and channeltron
aperture, the needed angle is then simply arctan (d1/d2).
Some default values can be found in the hardware section.
- Verify the correctness of the gains of the HV amplifiers
Refer to the manufacturer's manuals, enter the documented
gain values in the "software settings > LEED system" tab and apply them.
Finally check, whether the voltages displayed in the voltage meter
form are the same as either displayed on your HV amplifier or
as measured (test probe).
- Calculate the R space sensitivity
- Use a sample with well-defined known (or previously measured) geometrical dimensions
(use a caliper rule).
- Do an SEM scan of your sample with Volts as scan units. Focus the image with the gun lens(es).
- Draw a line which corresponds to a known dimension of your sample with the line tool.
- Copy the line parameters to the clipboard.
- Open the R sensitivity calibration form and paste the line parameters.
- Enter the dimension you marked with the line.
- Click on Calculate, and then on Apply.
- Apply the new R sensitvity value in the "software settings > LEED system" tab.
- Determine the timing constants of your system
Not yet implemented in V1.06.
Note: If you have received a new Omicron SPA-LEED system, these steps were already done for you.
After changing between internal and external geometry and vice versa
- Change the geometry settings in the "Software Settings > LEED" tab.
After changing the type of sample
- Choose the correct sample type in the "Software Settings > Sample" tab. If the sample is not yet
in the list, enter its parameters manually. It will automatically added to the samples list.
The sample constants are used for the calculation of the k space units %BZ and S
and their correctness is therefore mandatory for a correct k-space scaling.
After changing the position of the sample (sample transfer, maybe even heating)
- Calculate Image Shift Correction
It is assumed that you have already centered the (00) spot at very high energies (450eV)
solely mechanically by using sample rotation and sample tilt (if possible in your system). The following
steps make only sense, if you have already roughly aligned your system by doing so.
If you can not reproducibly align the sample rotational angles, you should
do the (00) centering at high energies as the 0th step before the image shift correction described in the
following.
Note: For most UHV sample manipulation systems with well-defined caliper scales you can probably
simply use the "once found" optimum mechanical alignment settings,
and just leave the rest to the electrical Image Shift Correction.
- Open the Image Shift Calculation form.
- Open two 2D scan forms. Choose Volts as scan units.
- Repeat the following steps (approx. 4 to 12 times) with different energies, for example
40eV, 80eV, 140eV, 180eV, 280eV, 400eV
- Do a large 2D scan (~50%..100%BZ). Identify the (00) spot. Avoid out-of-phase conditions.
- Select a region (rectangle tool) around the (00) spot.
- Copy rectangle parameters to clipboard and paste into the second 2D scan.
- Set resolution of second scan to about 150x150 pixels.
- Measure the center of intensity of the (00) spot with the ellipse tool.
- Copy the coordinates of the center of intensity to the clipboard and paste them into a new line of the table in the Image Shift Calculation form.
- After the coordinates of the (00) spot at different energies are copied to the table, click on Calculate.
- Check, whether the linear approximation looks good. If single spots deviate too much, you may delete them.
Note: At low energies you could be fooled by charging effects in the SPA-LEED or at your sample holder.
- Click on Calculate, then click on Apply.
- Apply the new linear image shift compensation parameters in the "software settings > DAQ" tab.
- Check at two different energies (e.g., 60eV, 250eV), whether the (00) spot is now nicely centered.
After each change of scan energy
- Verify that the beam park position is located in a low intensity region
2. Graphic tools
The graphic tools mainly support you in the selection of parts of the reciprocal space for
further investigation. For example, you can draw a line within a 2D scan to define
a 1D scan, you can select an elliptical region in 2D scans to get its center of mass for
a spot tracking measurement, or you can define a rectangular region in a 2D scan
for a detailed scan.
Secondly, some graphic tools provide rough data analysis functionality. They should not replace
a thorough offline data analysis, but in many cases you may want wo get a quick answer to questions like
- What are the two angles within a reconstruction's unit cell?
- Is the width of the (00) spot small enough to judge that the surface is clean and well-ordered?
- What is the angle of facet rods and what are the corresponding facet orientations?
and many more.
The line tool for 2D scans
The line tool allows you to draw a line between two crosshairs selected with the mouse.
A section through the 2D data along the drawn line is displayed, as well as
the parameters of the drawn line. For easier and more exact placement of the two
limiting crosshairs the relative intensities at the two end points
of the line are also displayed - this way you can place the two
crosshairs exactly on diffraction spots.
The line parameters can be copied to the clipboard in order to use them for a more
detailed 1D scan.

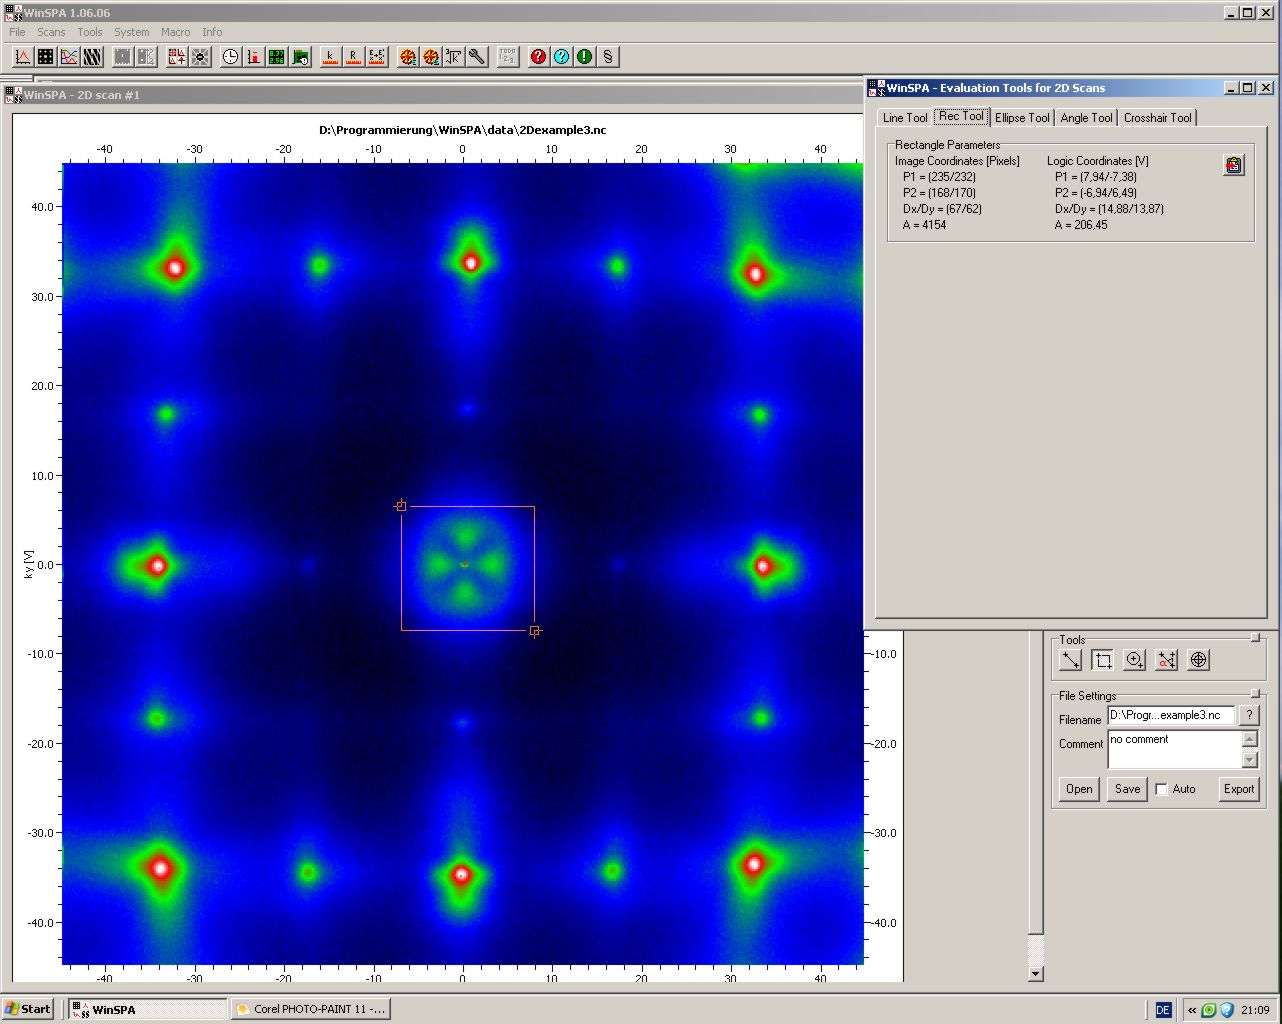
The rectangle tool for 2D scans
The rectangle tool allows you to select a rectangular region of interest within a 2D scan
by selecting two marker positions, which define two diagonal points of the rectangle.
You will get some basic information about the selected region.
The parameters of the rectangle can then be copied to the clipboard
in order to use them for a detail 2D scan.

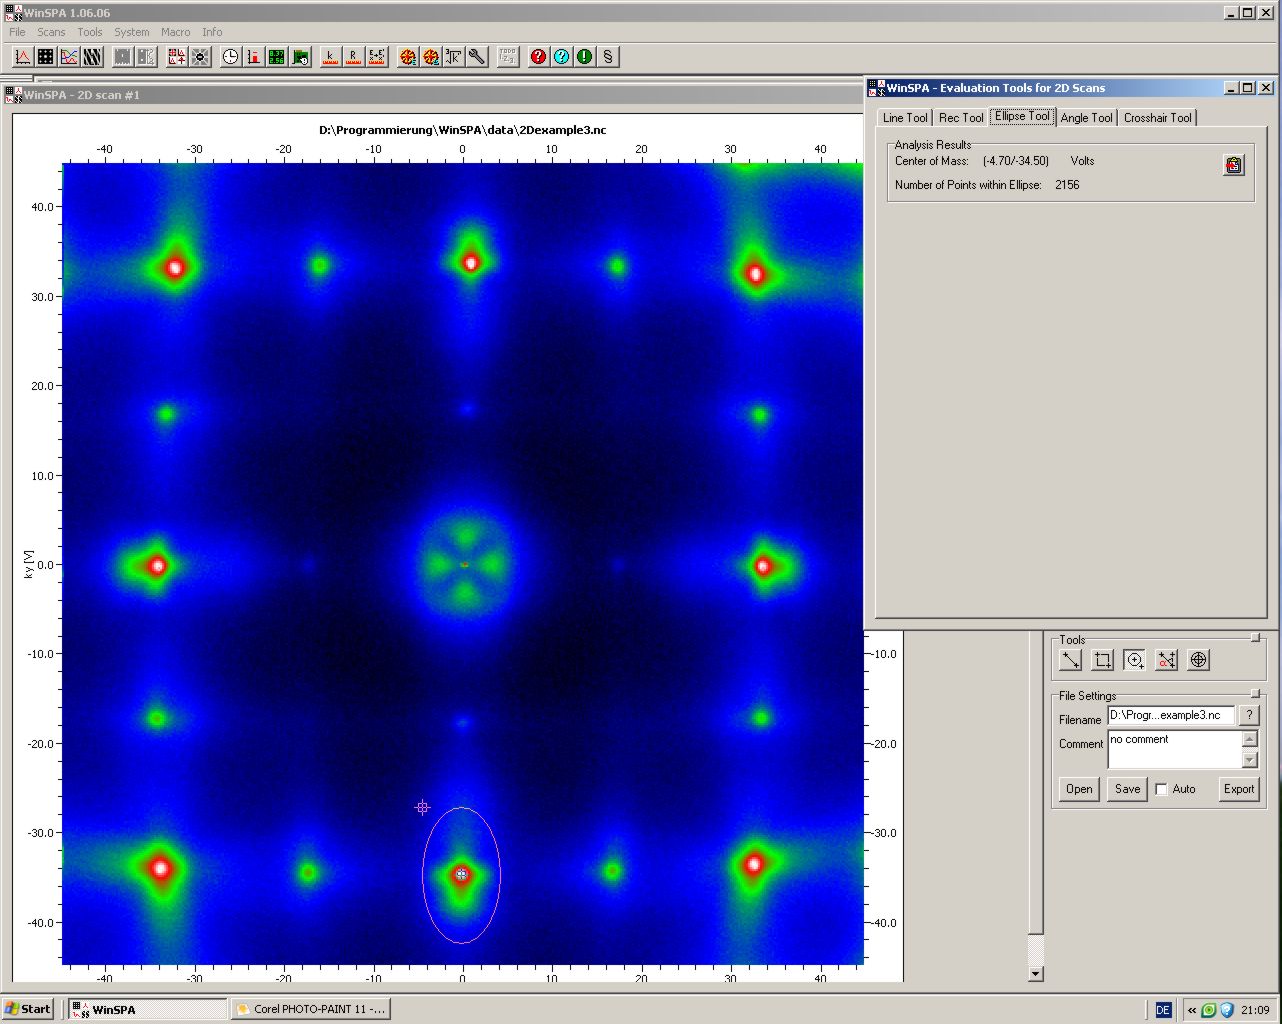
The ellipse tool for 2D scans
The ellipse tool allows you to select an elliptical region of intereset within
a 2D scan by selecting two marker positions, which define two diagonal points
of the outer rectangle of the ellipse. The center of mass of all data points
within the ellipse is calculated. This gives you a more representative
value for the center of a diffraction spot than the crosshair tool.
The center of mass within the ellipse can be copied to the clipboard
in order to be used in 0D scans (spot tracker)
as well as in the image shift calculation form.

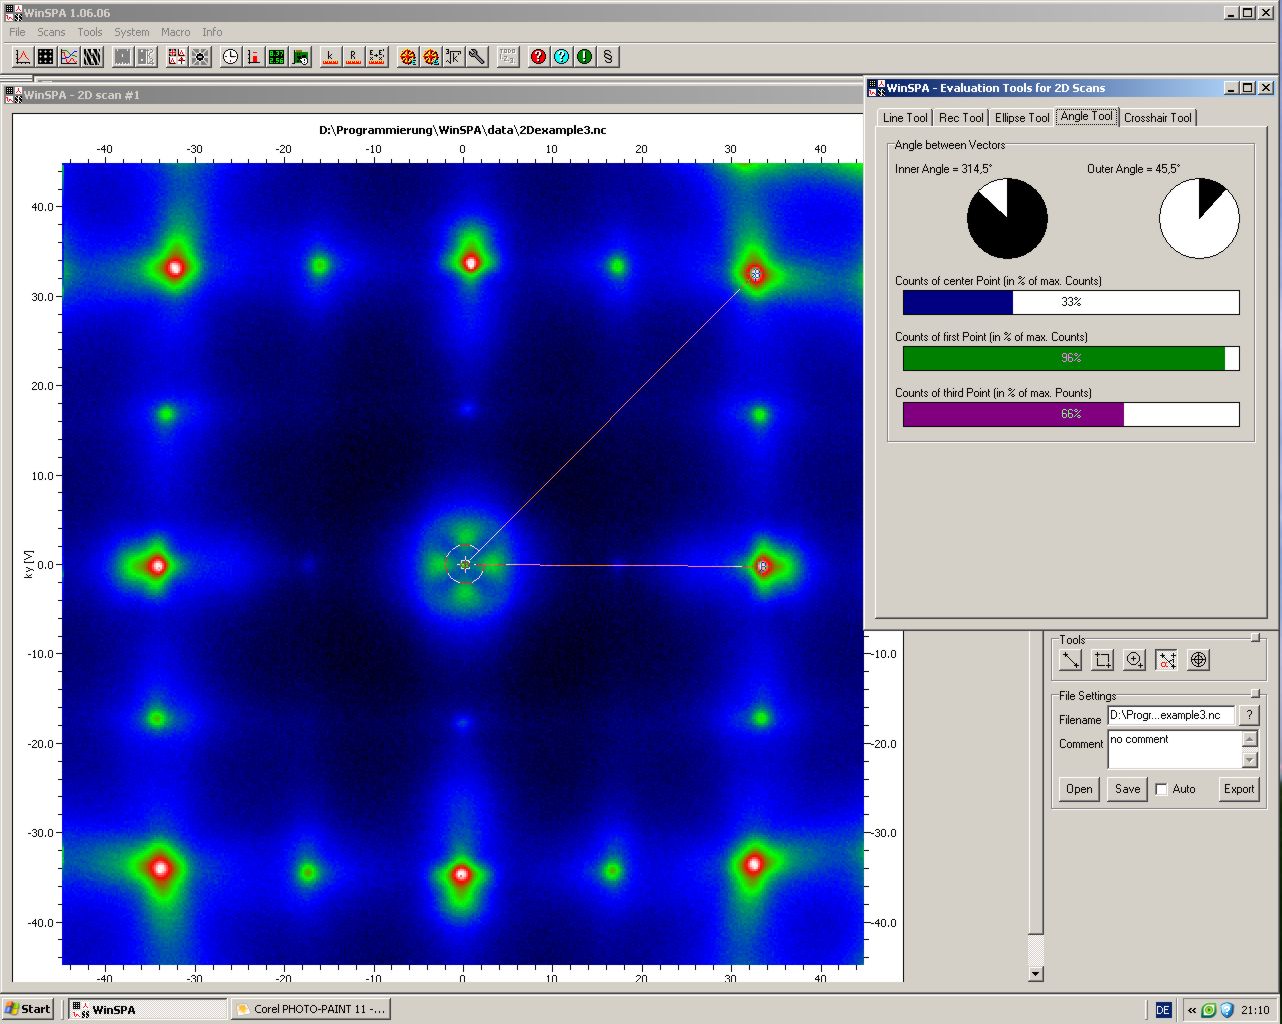
The angle tool for 2D scans
The angle tool allows you to select three points within a 2D scan via positioning
of three crosshair markers. These three markers define an angle.
For an exact placement of the markers on diffraction spots the relative intensity of each
marker in comparison to the maximum intensity within the 2D scan is shown.
You can
use this tool for estimating the symmetry of a diffraction image.
No copy to clipboard option is given for this tool.

The crosshair tool for 2D scans
The crosshair tool allows you select a point within a 2D scan with a marker.
The coordinates of this point are displayed as well as the relative intensity
in comparison to the maximum intensity of the scan.
For easier and more precise selection of the correct point
the local gradient (arrow) and curvature (circle) are also displayed.

3. K-space calculator
The k-space calculator provides four types of data and/or units conversion for
convenient planning of measurements:
- Conversion from 2D rectangle definition by center and rotation to edge coordinates.
- Conversion between edge and center definition of 1D scans.
- Conversion between k|| units (1/A, %BZ and Volts).
- Conversion between electron energy and scattering phase(S).
For example, if you want to define a 1D scan exactly through the centers of two diffraction spots, just measure
the two spots in an 2D overview (ellipse tool) and put the two points' coordinates into the
k calculator and calculate the 1D scan definition. Enter the values in a 1D scan form and
then just increase the scan length appropriately in order to have both spots fully scanned.

The first type of conversions is between 2D scan center and border coordinates.
| GUI element | Meaning and Usage |
|---|
| 2D Center Coordinates (x0,y0,dx,dy,angle) | Center coordinates (x,y), sizes (dx,dy) and angle of rotation of a rectangular 2D scan. |
| 2D Border Coordinates (x1..x4,y1..y4) | Coordinates of the four border points of the 2D scan. |
Th second type of k space coordinate conversions is between 1D center and border coordinates.
| GUI element | Meaning and Usage |
|---|
| 1D Center Coordinates (x0,y0,length,angle) | Center coordinates (x0,y0), length and angle of rotation of a linear 1D scan. |
| 1D Border Coordinates (x1,y1,x2,y2) | Coordinates of the two border points of the 1D scan. |
The third type of k space coordinate conversions allows to convert values between different kpar
coordinates.
| GUI element s | Meaning and Usage |
|---|
| k space value 1 | |
| k space unit 1 | |
| k space value 2 | |
| k space unit 2 | |
| Surface Lattice Constant | |
| k Sensitivity | |
| Electron Energy | |
The fourth type of k space coordinate conversions allows to convert values between different kperp
coordinates.
| GUI element | Meaning and Usage |
|---|
| Energy value | |
| Scattering phase value | |
| Step Height | |
| Incidence Angle | |
4. The help file
Here you can display this HTML help for WinSPA. You can either access the offline version of
this help which was supplied with your copy of WinSPA or the online version from the WinSPA homepage
in the world wide web.
The online version is subject to frequent updates and therefore probably more up to date than
the offline version.
5. The about window
The "about" window gives you the information about the precise release version of your copy of WinSPA.
All "real" releases are numbered with an X.YY scheme (X=main release number, YY=sub-release number),
beta versions are numbered with an X.YY.ZZ scheme where ZZ counts all compilation steps (=sub-sub-releases).


